Upon reaching the “Pending Accounting Review” status, invoices can be formatted into a file suitable for integration with the Omega ERP System. Delve into the following comprehensive guide to streamline this process effectively.
Preparation Before Export
Before initiating the export, checking the following Codelist Definitions ensures compatibility and accuracy:
- ERP booking types: Review and refine the data within “ERP Booking Types” to align with Omega’s predefined accounting rules and templates.
- Omega – document header types: Should custom headers exist within Omega, it’s imperative to replicate these in Flowis to facilitate correct invoice data exportation.
- Suppliers: Enhance operational efficiency by establishing default GL Accounts for suppliers. This can be achieved by selecting the supplier, accessing the ‘Edit’ function, and specifying the appropriate GL Account.
Export Process for Invoices
Embarking on the export journey requires systematic execution:
1. Initiating Export: Access invoices labeled as “Pending Accounting Review.” Within the ‘Review’ action, fill in the GL Postings table with pertinent details, including GL account, Tax, Cost center, Amount, and any additional required information. If possible, select a Booking Identifier located above the GL Postings table to facilitate accurate ERP Booking type identification.
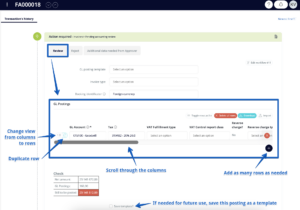
2. Automated Validation Protocols: Post-review, Flowis undertakes various ERP booking checks to identify duplicate invoices and validate the accuracy of the supplier’s banking account. Upon successful validation, invoices transition to the “Pending Export to ERP” status.

3. Batch Transaction Creation: Navigate to the left menu, select “Accounting/Paying,” proceed to the “Create Batch Transaction” tab, and opt for “Accounting.”
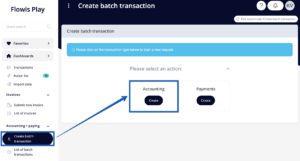
Activate the orange button, filter and select the desired invoices (accessible via the filter, limited to those in “Pending Export to ERP” status).
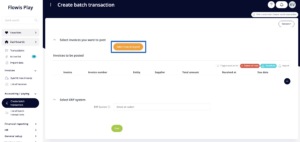
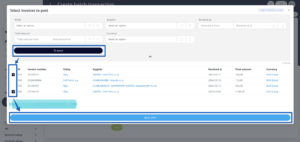
Execute by clicking “Post.”
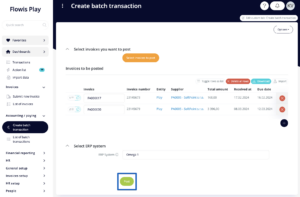
This action generates a new Transaction housing a text file primed for Omega importation.
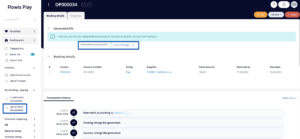
Additionally, this text file remains accessible within the Invoice transaction.
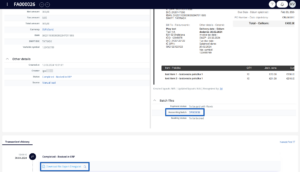
Importing Invoices into Omega
The concluding phase involves importing the formatted invoices into the Omega ERP System:
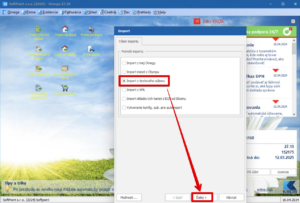
1. Accessing Omega ERP: Launch the Omega ERP interface, navigate to “Company” within the top menu, and proceed to “Import,” followed by “Import from Text File.”
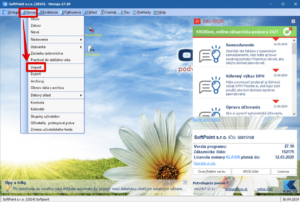
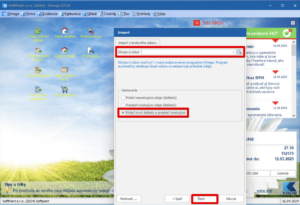
2. Importation Procedure: Identify the saved text file, select the desired invoice management option (it is recommended to opt for “Add New and Replace Existing”), and commence the import process by clicking “Start.” Upon completion of the importation, the invoices will be readily accessible within the Evidence section.
By adhering to this structured approach, invoices are aptly formatted and integrated with the Omega ERP System, ensuring efficiency and accuracy throughout the process.