
Embarking on your invoice management journey involves configuring essential Codelists to ensure seamless operations. Once this setup is complete, it’s time to initiate the process of uploading your first invoices. Let’s explore the two methods available for this task.
Manual Submission
The first method entails manually submitting the invoice file to the system. Navigate to the left menu and locate the “Invoices” section. Within this section, select “Submit new invoice” to start the process. Here, you’ll be prompted to specify the receive date of the invoice, upload the file, and click “Submit.” With these simple steps, your invoice is seamlessly integrated into the system and progresses through the approval process.

Automatic Submission
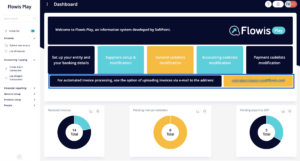
For those seeking enhanced efficiency, automation is the optimal solution. The Flowis Play Invoice system offers the convenience of automatic invoice upload directly from an email inbox. A dedicated email inbox has been set up for your company, mentioned on the Dashboard of your Invoice system. By forwarding all invoices to this designated email address, Flowis Play autonomously retrieves and processes them for approval. Within minutes, these invoices appear within the Flowis Play system, eliminating manual intervention and streamlining the workflow.
With these user-friendly methods at your disposal, initiating the upload process for new invoices is both efficient and hassle-free.
