In our previous article, you learned the basics about Custom Tabs – what are they good for and what general setup do they require. Here you will learn about all the types of Custom Tabs – how they look and how can you set them up. Every one of them allows you to set up a specific shortcut for your Users to get to their agenda easily.
Action List Menu Item
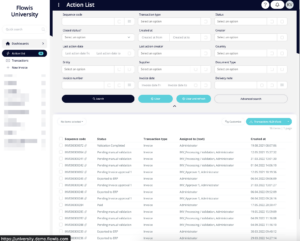
Shows Transactions that are pending your action.
- Show permissions – which Show Permissions shall be applied to Transactions opened from this Custom Tab
- Filter permissions – which Filter Permissions will be applied after opening this Action List Menu Item
- Available Downloads – you can enable the Users to download Transaction data from this Action List, either with a system download (available by default, various formats) or a custom download (can be set up in Data Exports Configuration)
- Allowed bulk actions – which bulk actions will be available and which Groups can run them
- Per page – how many Transactions are shown on each page in this Action List. The default is 100.
- Hide menu badge? – by default, Action List Menu Item Custom Tabs show a number of pending actions in the form of a small menu badge. If checked, the menu badge will not be shown.
- Filter (Input conditions) – conditions that need to be met for the Transactions to be shown in this Action List
- Apply access permissions? – by default, Access Permissions are not considered in the Action List since it is expected to have such a configuration of Workflows, that the User is allowed to execute an action only on Transactions to which they have access. Use this option to apply Access Permissions to exclude Transactions without explicit consent.
- Merge access permissions? – this option displays Transactions that are assigned to the User OR they are available by Access Permissions
- Access permissions – if empty, the system will use by default all Access Permissions relevant to the User and combine them. In some cases, it may have a negative effect on performance and you may want to explicitly list which Access Permissions to use.
- Disable assignments? – by default, the User can see all Transactions with either Access Permissions or Assignments. In some cases, it makes the performance worse or shows unexpected results.
- Order – select the field that will be primary for ordering the records and then choose the direction – ASC (ascending) or DESC (descending)
Assignments Menu Item
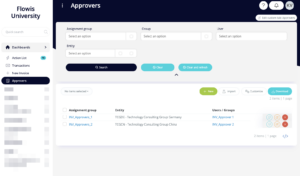
Shows the list of Assignments based on the conditions that you set up further below.
Definitionable Menu Item
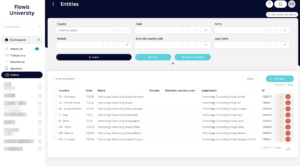
Shows the records of a specific Definition.
- Model – choose which Definition should be shown in this Custom Tab
- Per page – how many records are shown on each page in this Custom Tab. The default is 100.
- Disable form drafts? – when creating a new record, Flowis auto-saves the form in case you may need it. If you check this option, the auto-save will be deactivated
- Edit permissions – here selected Edit Permissions will be used when editing records from given Definition
- Input conditions – conditions that need to be met for the Definition records to be shown in this Custom Tab
- Order – select the field that will be primary for ordering the records and then choose the direction – ASC (ascending) or DESC (descending)
- Available downloads – you can enable the Users to download records from this Custom Tab, either with a system download (available by default, various formats) or a custom download (can be set up in Data Exports Configuration)
- Allowed bulk actions – which bulk actions will be available and which Groups can run them
- Groups allowed to destroy records – only here selected Groups will have the permission to permanently delete. records from the Definition
Multiple Definitionable Menu Item
This Custom Tab will allow basic Users to access, edit, and delete the data from all selected Definitions.
- Models – select all of the Definitions that you want to be accessible to Groups selected in this Custom Tab
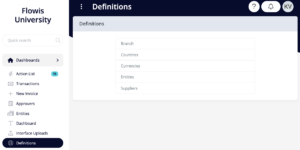
When you open the Custom Tab, you will see all the selected Definitions:
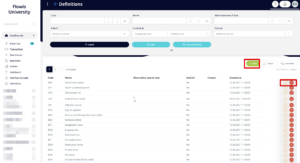
After clicking on any of them, you will see all the records from the given Definition and you will be able to either see, edit, delete, or add new records:
Emails Menu Item
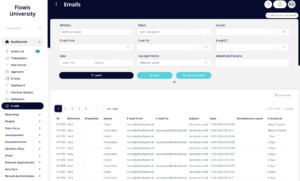
Using this Custom Tab, you will be able to allow non-admin Users of Flowis to see all of the emails received or sent from Flowis. By clicking on any row in the list, you will open the details about that particular email, including its attachments.
New Transaction Menu Item
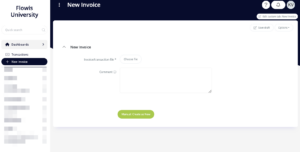
This Custom Tab will allow you to manually create a new Transaction.
- List type – you can set up this tab to create only Transactions of one Transaction Type or multiple selected Transaction Types. There are 3 options:
- None – only one Transaction Type, the form will be opened immediately after clicking on the Custom Tab
- Buttons – use buttons to select from multiple Transaction Types
- Dropdown – use the select box to select from multiple Transaction Types
- Create permission – which Create Permissions will be used to create a new Transaction. You must select only one Create Permission if the “None” list type is selected above
- Transaction types – You can select 0 or 1 Transaction Type if the “None” list type is selected. By default, the first Transaction Type from Create Permission is used. You can override it here. For other list types, if nothing is selected, all active Transaction Types are shown by default.
- Disable form drafts? – when creating a new Transaction, Flowis auto-saves the form in case you may need it. If you check this option, the auto-save will be deactivated
- Success custom tab – the User will be redirected to this tab after the successful creation of a Transaction
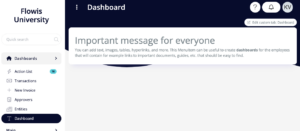
Text Menu Item
Use this Menu Item to write text, upload an image, etc for the Users to see.
Transactions Calendar Menu Item
This Menu Item allows you to create a calendar with Transactions grouped by a specific Date field on the Transactions (e.g. by due dates). The setup requires a little coding so we recommend you to contact your Flowis administrator to do this for you.
Transactions Menu Item
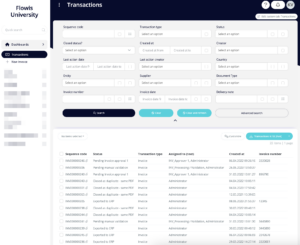
Here you will see the list of Transactions that meet your setup.
- Access permissions – if empty, the system will use by default all Access Permissions relevant to the User and combine them. In some cases, it may have a negative effect on performance and you may want to explicitly list which Access Permissions to use.
- Show permissions – which Show Permissions shall be applied to Transactions opened from this Custom Tab
- Filter permissions – which Filter Permissions will be applied after opening this Action List Menu Item
- Available downloads – you can enable the Users to download Transaction data from this Action List, either with a system download (available by default, various formats) or a custom download (can be set up in Data Exports Configuration)
- Allowed bulk actions – which bulk actions will be available and which Groups can run them
- Per page – how many Transactions are shown on each page in this Action List. The default is 100.
- Create permissions – “+ New” buttons that will allow creating a new Transaction will appear. Select which Create Permissions should be used for this option
- Disable assignments? – by default, the User can see all Transactions with either Access Permissions or Assignments. In some cases, it makes the performance worse or shows unexpected results.
- Filter (Additional input conditions) – conditions that need to be met for the Transactions to be shown in this list
- Order – select the field that will be primary for ordering the records and then choose the direction – ASC (ascending) or DESC (descending)
