Let’s create your first process together – the absence request approval process.
Start by carefully planning the entire process. Consider what type of information will be stored in each transaction, what Users will see, the steps involved in the approval process, who will be responsible for each action, and when notification emails should be sent. Think through every detail to ensure a seamless workflow.
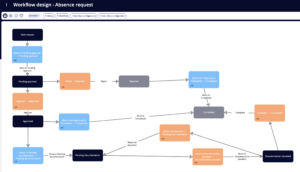
To get started, we recommend creating a diagram that outlines the process, defines the data structure, and maps out the notification triggers.

Transaction Type Group and Transaction Type
Once you have your diagram, you can start your work in Flowis. First, you will need to create the Transaction Type Group and Transaction Type, where you will define all of the fields that will be contained on the absence request and their data type. For example: absence type (choose from a list of values), absence date (date range), documentation (attachment), and more.
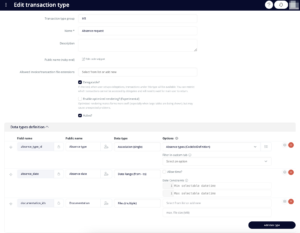
To add an Association to Transaction Type, a Codelist Definition needs to be created first and filled with desired values.
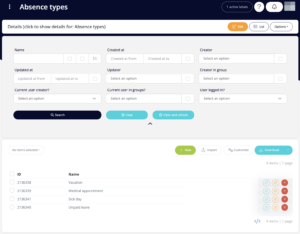
After creating the Transaction Type, you can develop other related components.
Sequencer
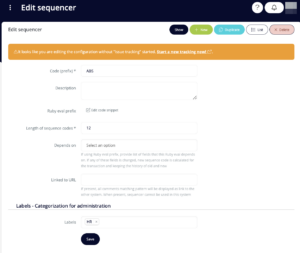
Create a unique logic for naming the Transactions. Choose a code (prefix), ideally a combination of letters that will let the Users know, what Transaction Type are they dealing with, e.g. ABS (as “absence”); and the length of Sequence code – it should be long enough to cover all of the created absence requests in the future, typically 10 or 12 characters should cover the future needs.
Groups
Almost all of the next steps will require setting up Groups that will be allowed to see or perform certain action. To make sure all of the steps of the process are available only to those that have the permission to see it, create Groups for every important group of Users. For this particular process, we recommend to create groups like:
- Managers – will have the permissions to see the absence requests of their subordinates
- HR – will have the permissions to see all of the absence requests; they will also be asked to confirm the provided absence documentation is sufficient
Do not forget to add all relevant Users to these Groups – otherwise, they will not have the permissions that only these Groups would grant them.
Show Permissions
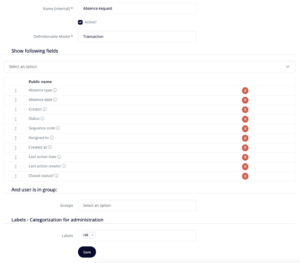
Define which fields are visible after opening the Transaction. Do not forget to add all the fields regarding both Transaction details and technical details, such as the Transaction’s Status, Creator, or Sequence code. Check the details about setting up Show permissions in our separate article.
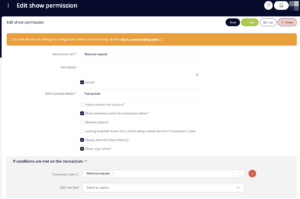
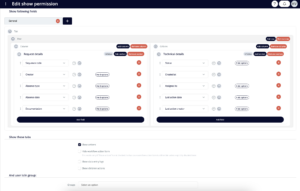
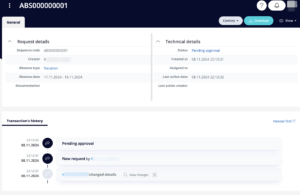
The same needs to be done for all of the Definitions that you want the Users to use.
Statuses
Create all of the possible Statuses of the Transaction – the diagram you created in the first step will be a great helper here, each box is a separate Status.
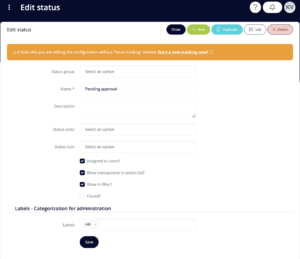
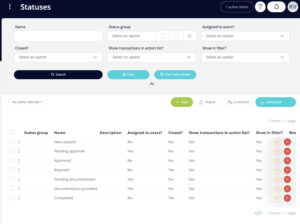
Workflows
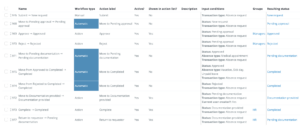
Create all of the Workflows that will move the Transaction from one Status to another. You can see the example of such Workflows on attached screenshots, but for further explanation on how to set up each part of the Workflows, please, see our detailed articles dedicated to this topic.
Create Permissions
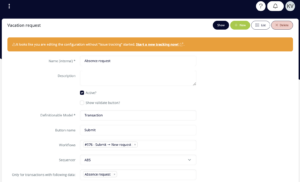
Create the form where Users can create new Transactions. Add all of the fields necessary to create the absence request and choose which Workflow should be run to start the approval process.
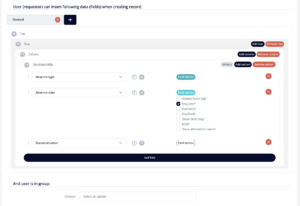
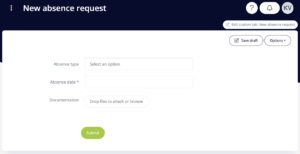
The same needs to be done for all of the Definitions that you want the Users to use and create new records here.
Access Permissions
Define which Users can access the absence request Transactions – see them in the list of Transactions, open them, and see their details.
It is useful to create one Access Permissions to view all absence requests (for HR), and one Access Permissions to view current User’s absence requests, eventually one for the Managers, to see the requests of their subordinates.
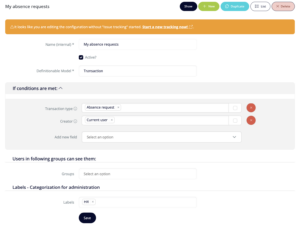
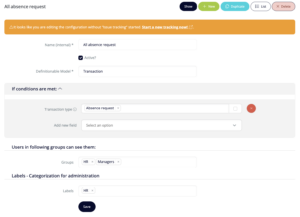
The same needs to be done for all of the Definitions that you want the Users to use and see. Otherwise, they will not see for example the absence types in the form when creating the new absence request.
Filter Permissions
Define which fields will be available for the Users to filter among the Transactions. The same can be done for all of the Definitions that you want the Users to use. If no Filter Permissions are set, all of the available content and system fields will be listed in the filter, which may be a little overwhelming for the Users.
Custom Tabs
Create the tabs for the left menu where Users can access the list of absence requests and the form to create new absence request.
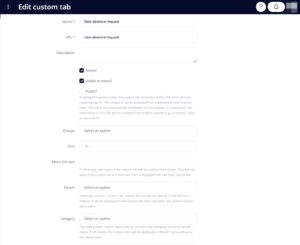
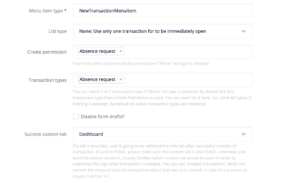
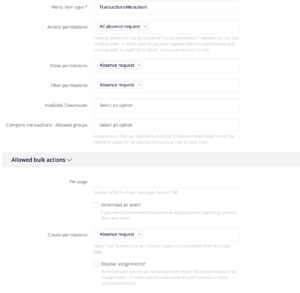

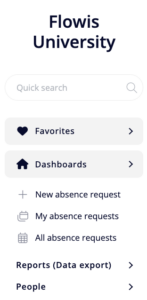
Table Layouts
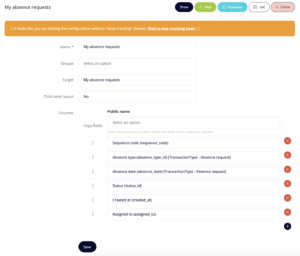
Predefine the layout the Users will see when opening any of the Custom Tabs you just created. Make sure you involve every column needed and put them in the most convenient order.
E-mail Templates
Flowis offers a feature of sending e-mail notifications to Users once the absence request reaches certain Status. It is helpful to add a notification to every step of the process that requires action from certain User or when you want to notify the User about important change of Status of the Transaction. In our process, it will be when the Absence request is:
- pending approval – notification to Manager,
- approved or rejected – notification to requestor,
- pending documentation – notification to requestor,
- provided documentation – notification to HR.
The first step is to created desired E-mail templates with the e-mail subject and body – please, see our detailed articles about how to properly set up a new E-mail template and how to write and formate the body.
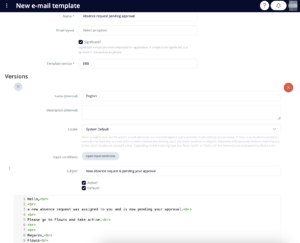
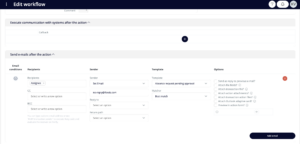
After setting up the template, you need to add this E-mail template to related Workflow. The template we just created, “Absence request pending approval”, will be manually added to the Workflow that moves the Transaction to the “Pending approval” Status. Please, see our article related to setting up e-mail notifications in Workflows to see further details about individual fields.
Congratulations! You have successfully set up all the essential components of an absence request approval process. You can now create new absence requests and efficiently manage them across your organization. Flowis also offers a range of additional features to enhance your process, including automated reports for HR and managers, vacation day tracking for employees, customizable dashboards, and more. For further guidance on these features, explore our comprehensive Flowis University articles.
If you’re interested in implementing a more advanced feature or require assistance with a complex setup, our team is here to help. Please don’t hesitate to reach out, and we’ll work with you to identify and implement the best solution for your needs.